Photography Travel Kit - Exploring Vietnam
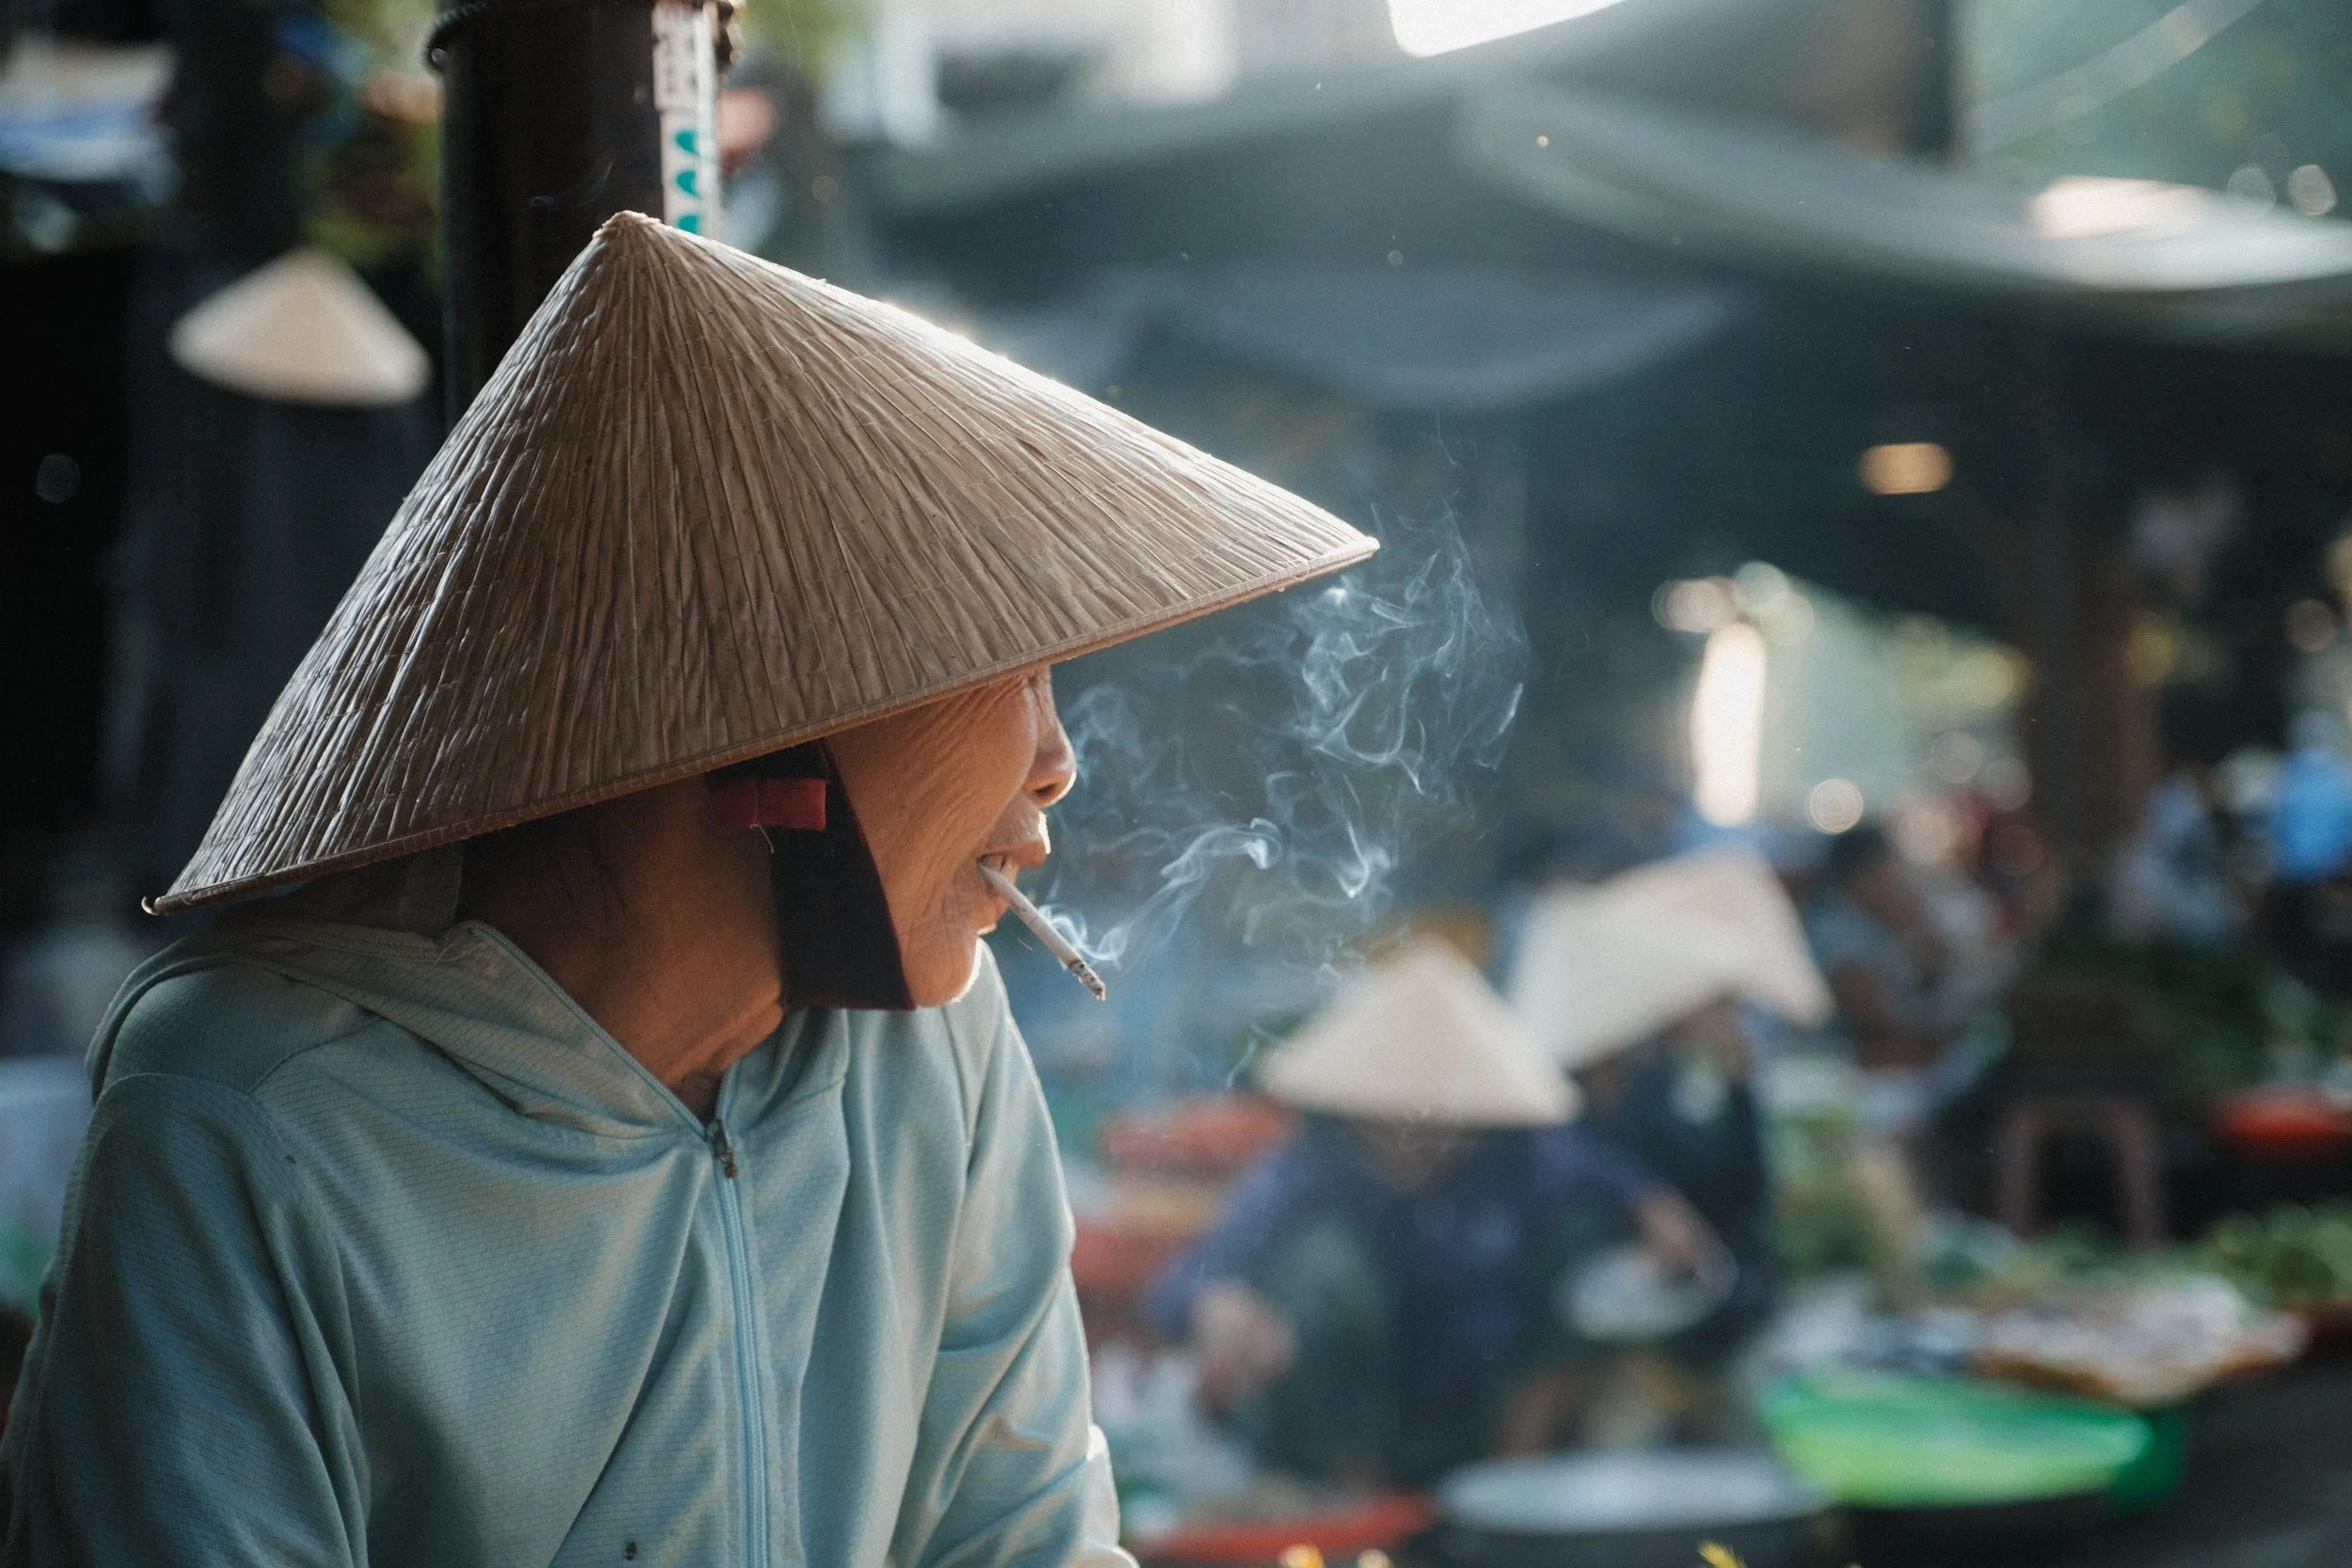
When I’m packing for travel, I aim to stay as lightweight and minimal as possible. I hate lugging around a bunch of bags and avoid checking luggage unless the trip absolutely demands it. Over mid-2024 and into the New Year of 2025, I made two trips to Vietnam. The first trip was about 80% urban exploration and 20% nature, while the second was a more city-focused journey, with 90% urban shooting and just 10% nature.
Across both trips, I tested a few lens configurations, but my golden rule is always this: no more than three lenses. In this blog, I’ll share the setups I used, the rationale behind my choices, and how I structure my one-bag travel kit.

Camera
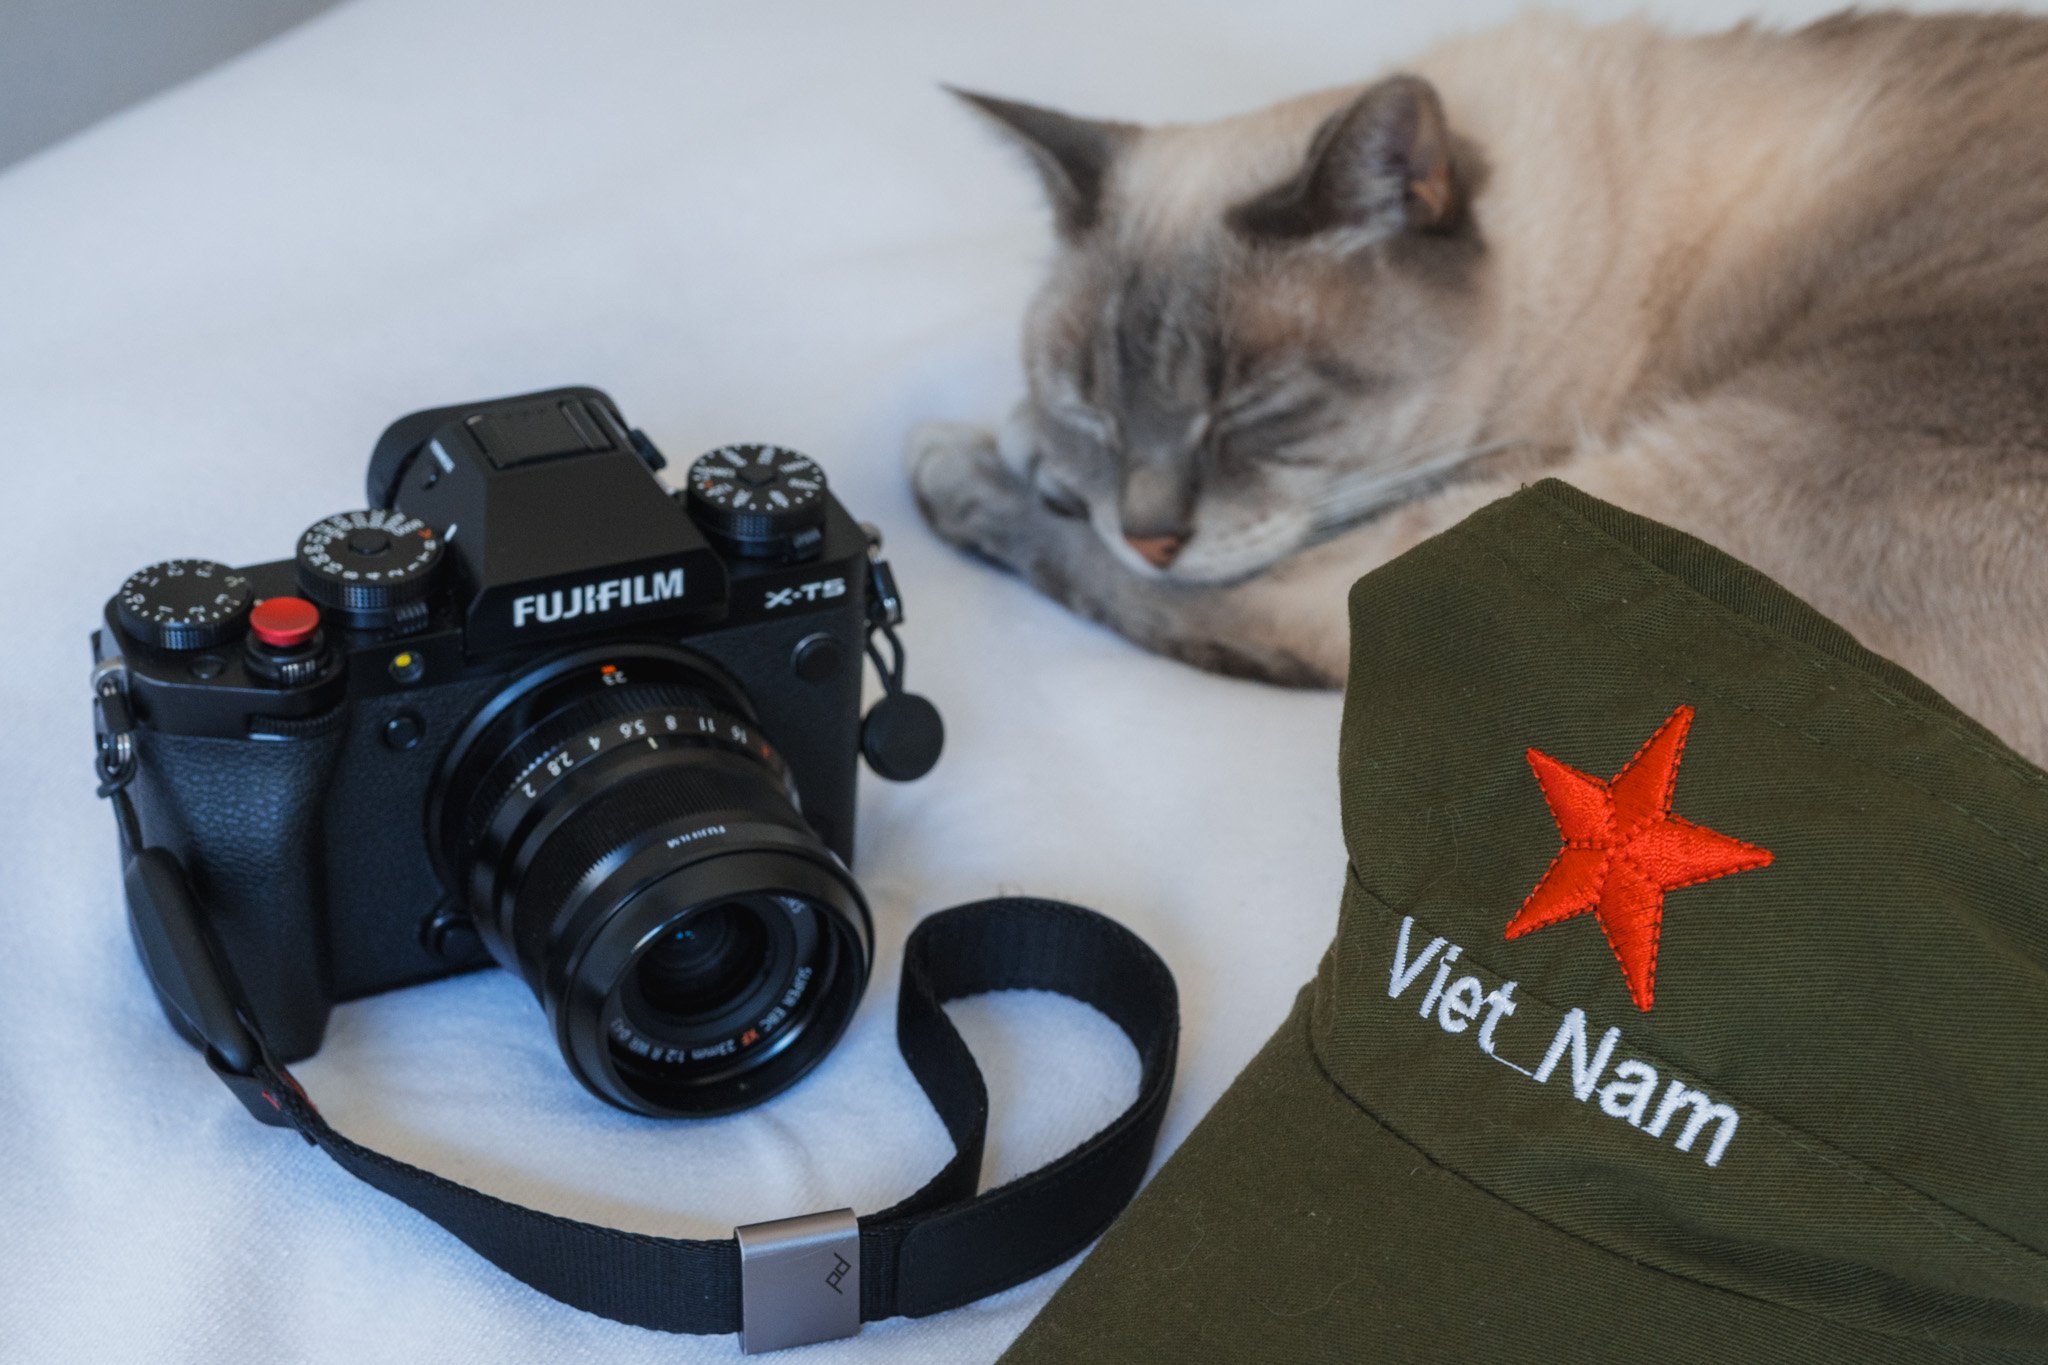
At the core of both builds was the Fujifilm X-T5. This is hands-down one of the best APS-C cameras for photographers, especially if you’re into travel, street, or documentary work. It’s compact, stylish, and easy to use. The image quality? Stellar.
The X-T5’s pro-level features, like weather sealing, were essential for dealing with Vietnam’s high humidity, sudden downpours, and scorching heat. Its small size and discreet look also helped me blend into the background..
Build One: Versatility (Mid-2024 Trip)
For my first trip, I focused on Hanoi and Hoi An. My experience with South East Asia was limited for photography, all I knew was I would be balancing chaotic urban streets with quiet rural villages. Knowing I’d face a variety of environments and subjects, I built my kit around versatility while sticking to my three-lens rule.
Fujifilm 23mm f/2
This was my go-to walkaround lens. The 35mm full-frame equivalent is ideal for storytelling, wide enough for establishing shots but tight enough to capture subject shots at a distance.
I’m glad I didn’t skip this lightweight prime because the other two lenses were on the bulkier side. Whether grabbing coffee or wandering through chaotic markets, this lens helped me document those in-between moments. It’s a quiet achiever, perfect for quick, candid shots.
Fujifilm 16-55mm f/2.8
My “I don’t know what I’ll face, but I’ll be ready” lens. This 24-70mm full-frame equivalent zoom covered everything from wide environmental shots to tighter telephoto compositions.
In rural areas, like incense and pottery villages, this lens was invaluable. The mix of tight and wide spaces in these settings made repositioning difficult, especially when subjects were working with hot materials or sharp tools. Zooming in and out gave me the flexibility to capture their craft without getting in the way.
Fujifilm 90mm f/2
The wild card. This lightweight telephoto was a bit of a gamble as I hadn’t used it much before the trip. I was worried it might feel heavy alongside the 16-55mm, but compromising by swapping lenses occasionally or leaving one behind at the hotel kept my sling light.
The creative shots I got with this lens were fantastic. It excels at capturing tight details and unique compositions, adding a touch of abstraction to my storytelling.
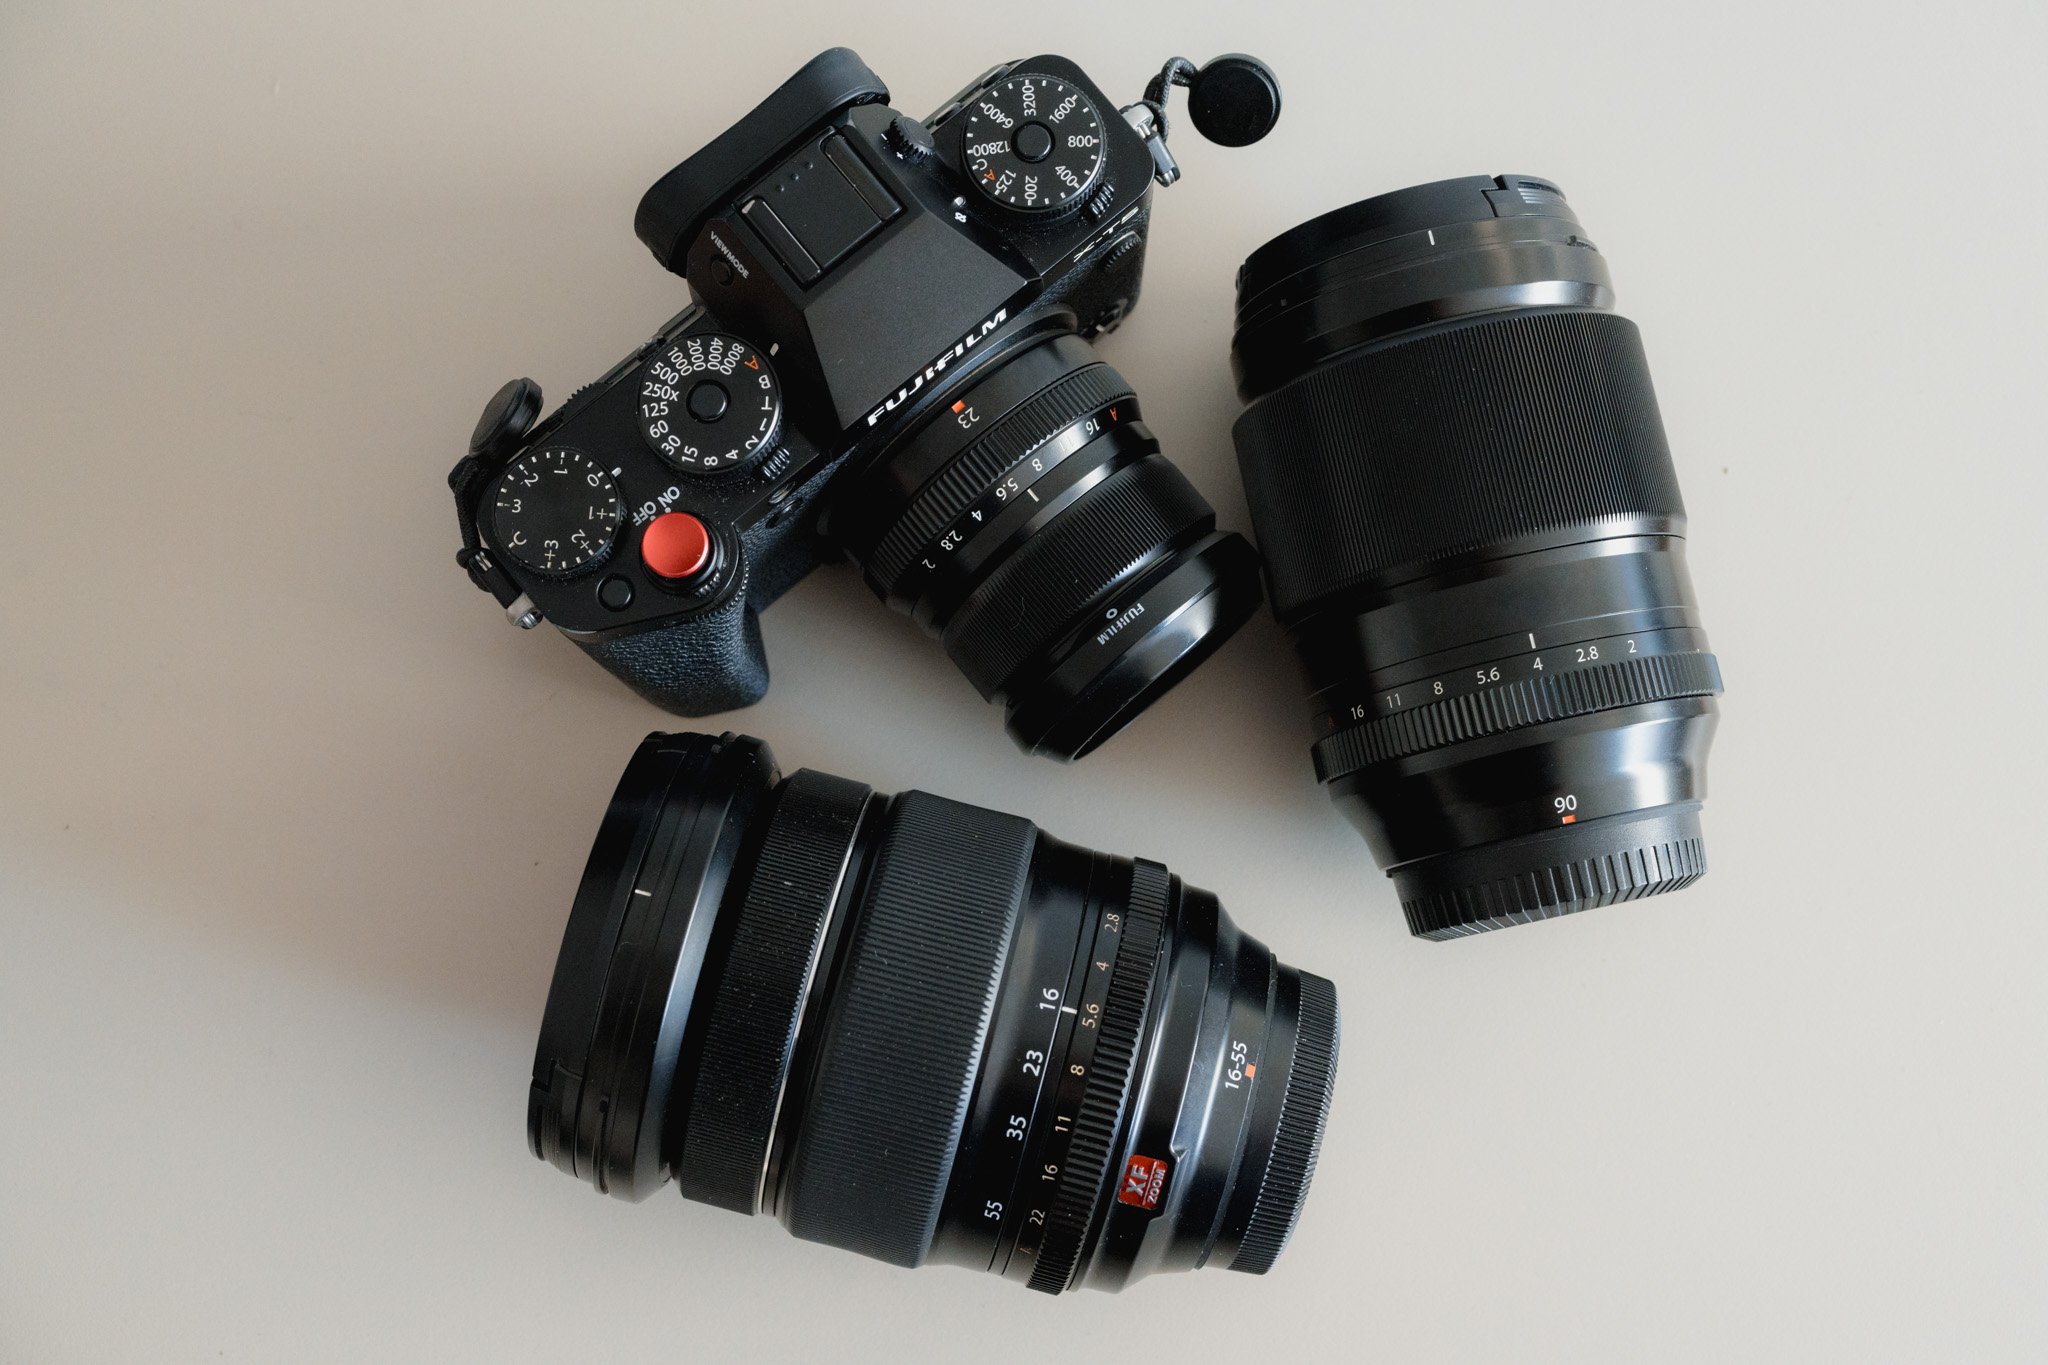
This kit worked beautifully for a longer trip. With a storytelling prime (23mm), a versatile zoom (16-55mm), and a telephoto (90mm) for extra reach, I felt prepared for anything Vietnam threw my way. While the 16-55mm was useful, this lens is so damn bulky for a APSC lens, I’d consider swapping it for a compact zoom like the Sigma 18-50mm f/2.8 for added flexibility. As having all three in the sling, let’s just say, tension on my shoulder was felt after a full day out.
Build Two: City Hopper (New Year’s 2025 Trip)
For my second trip, I focused on the south, mainly Ho Chi Minh City (Saigon) and a few days by the ocean in Vung Tau. This was a shorter trip with a strong emphasis on urban street photography. I needed to be lighter on my feet, so I went with an all-prime setup.
Fujifilm 23mm f/2
Same as before, my primary walk around lens, and for good reason. This lens accounted for about 60% of my shots. It’s light, fast, and perfect for storytelling. Running around with just this lens felt freeing, and I could confidently capture scenes on the fly.
Fujifilm 50mm f/2
This mid-telephoto prime (76mm full-frame equivalent) filled the gap for detail and abstract shots. It was small, lightweight, and sharp, making it my second most-used lens (about 35% of my shots). Whether capturing compressed street scenes or picking out details , this lens delivered.
Fujifilm 27mm f/2.8
The wildcard for this trip, but with a much smaller role (around 5% of my shots). I picked this lens as an everyday carry option, mainly for documenting travel between locations, airports, Grab rides, etc. Its 41mm full-frame equivalent field of view sits between wide and tight, perfect for quick, clean compositions.

The 23mm and 50mm combo is my favourite for travel & street photography lenses. They’re lightweight, versatile, and capable of capturing incredible stories. While the 27mm was useful and I could barely notice it in my bag being so small. I think it’s a bit two close in focal range to the 23mm that I could have easily skipped taking it and rolling with the two prime setup. My three lens rule is not more than three so maybe this build should just be a two prime setup.
The Sling
For both trips, I used the Bellroy Venture Sling 10L. (camera edition) As an Aussie brand loyalist, I’ve been a fan of Bellroy for years. This sling is weather-resistant, flexible, and comfortable, it compresses when partially empty, making it great for travel.
Unlike rigid slings (looking at you, Peak Design), the Bellroy molds to your back, making it super comfy for long days. It’s spacious enough for lenses, gear, and essentials, with thoughtful organisation for small items like chargers and SD cards.

Tech and Peripherals
MacBook vs. iPad
For longer trips, my MacBook Pro is essential. It’s perfect for editing photos/videos, managing files, and accessing websites that are clunky on mobile.
For shorter trips, I’ve switched to using an iPad Mini instead of the larger iPad Pros. The Pros felt cumbersome, especially given the trade-offs with iOS limitations like file management.
The iPad Mini serves as a great backup device if my phone goes missing and is perfect for offloading SD cards. Using a MacBook or iPad for these tasks also frees up my phone, so I can head out while backups are running.
Overall, the iPad Mini is an excellent secondary device. On flights, it’s a fantastic e-reader or entertainment hub for movies and shows. It’s also great for editing on the go, if you’re comfortable with Lightroom Mobile, you can get all your edits done without a hitch in this streamlined workflow.

Chargers, Backup, and Cleaning
It’s funny because digital photography causes you to need to bring a bunch of electronics even if you want to be a minimal traveler. Chargers, Backup and Cleaning. It all fits in a small tech pouch. Anything that I want quick access to i’ll throw it into the top compartment of my back pack.
Chargers: Universal power bricks, a high-capacity power bank, and my trusty SmallRig dual camera battery charger are my go-tos.
Having a universal power brick is great for obvious reasons but they are often large and bulky. No way around that but I’m searching for that unicorn minimal small one. A battery bank, is great for having power on the go or even on the plane as some airlines don’t have power points. I’ll often travel with a large capacity power brick that lets me charge multiple electronics at once really quickly and a smaller one as a backup. I’ve blown power bricks before from dodgy outlets. I usually travel with 3 camera batteries and use a Small Rig battery bank that lets me charge two batteries at once from a USB-C port.

Backup: SD cards, a fast external SSD, and offloading to Lightroom’s cloud are my insurance against data loss.
I’ll travel with a handful of SD cards and always carry a fast external SSD. Coupled with the MacBook, iPad or even the mobile. You can offload full cards onto set device and having an external drive is extra insurance for your photos and videos. The workflow I aim for is fill SD cards, and once at a hotel. Offload them onto device of choice, then backup the same data to the external drive. If I have decent WIFI at a hotel, Lightroom will upload everything to the cloud for extra insurance. Don’t judge me, coming from a I.T. background, I’ve seen disasters regarding data loss. So here I am, cautious and protect my data like heirloom jewels. I recommend to anyone traveling with a camera to at the very minimum, offloading photos to something else to the SD cards is a must in my eyes. This can easily be achieved using your mobile. Either through brand apps to send the files wirelessly or USB-C direct attach the camera to a mobile.

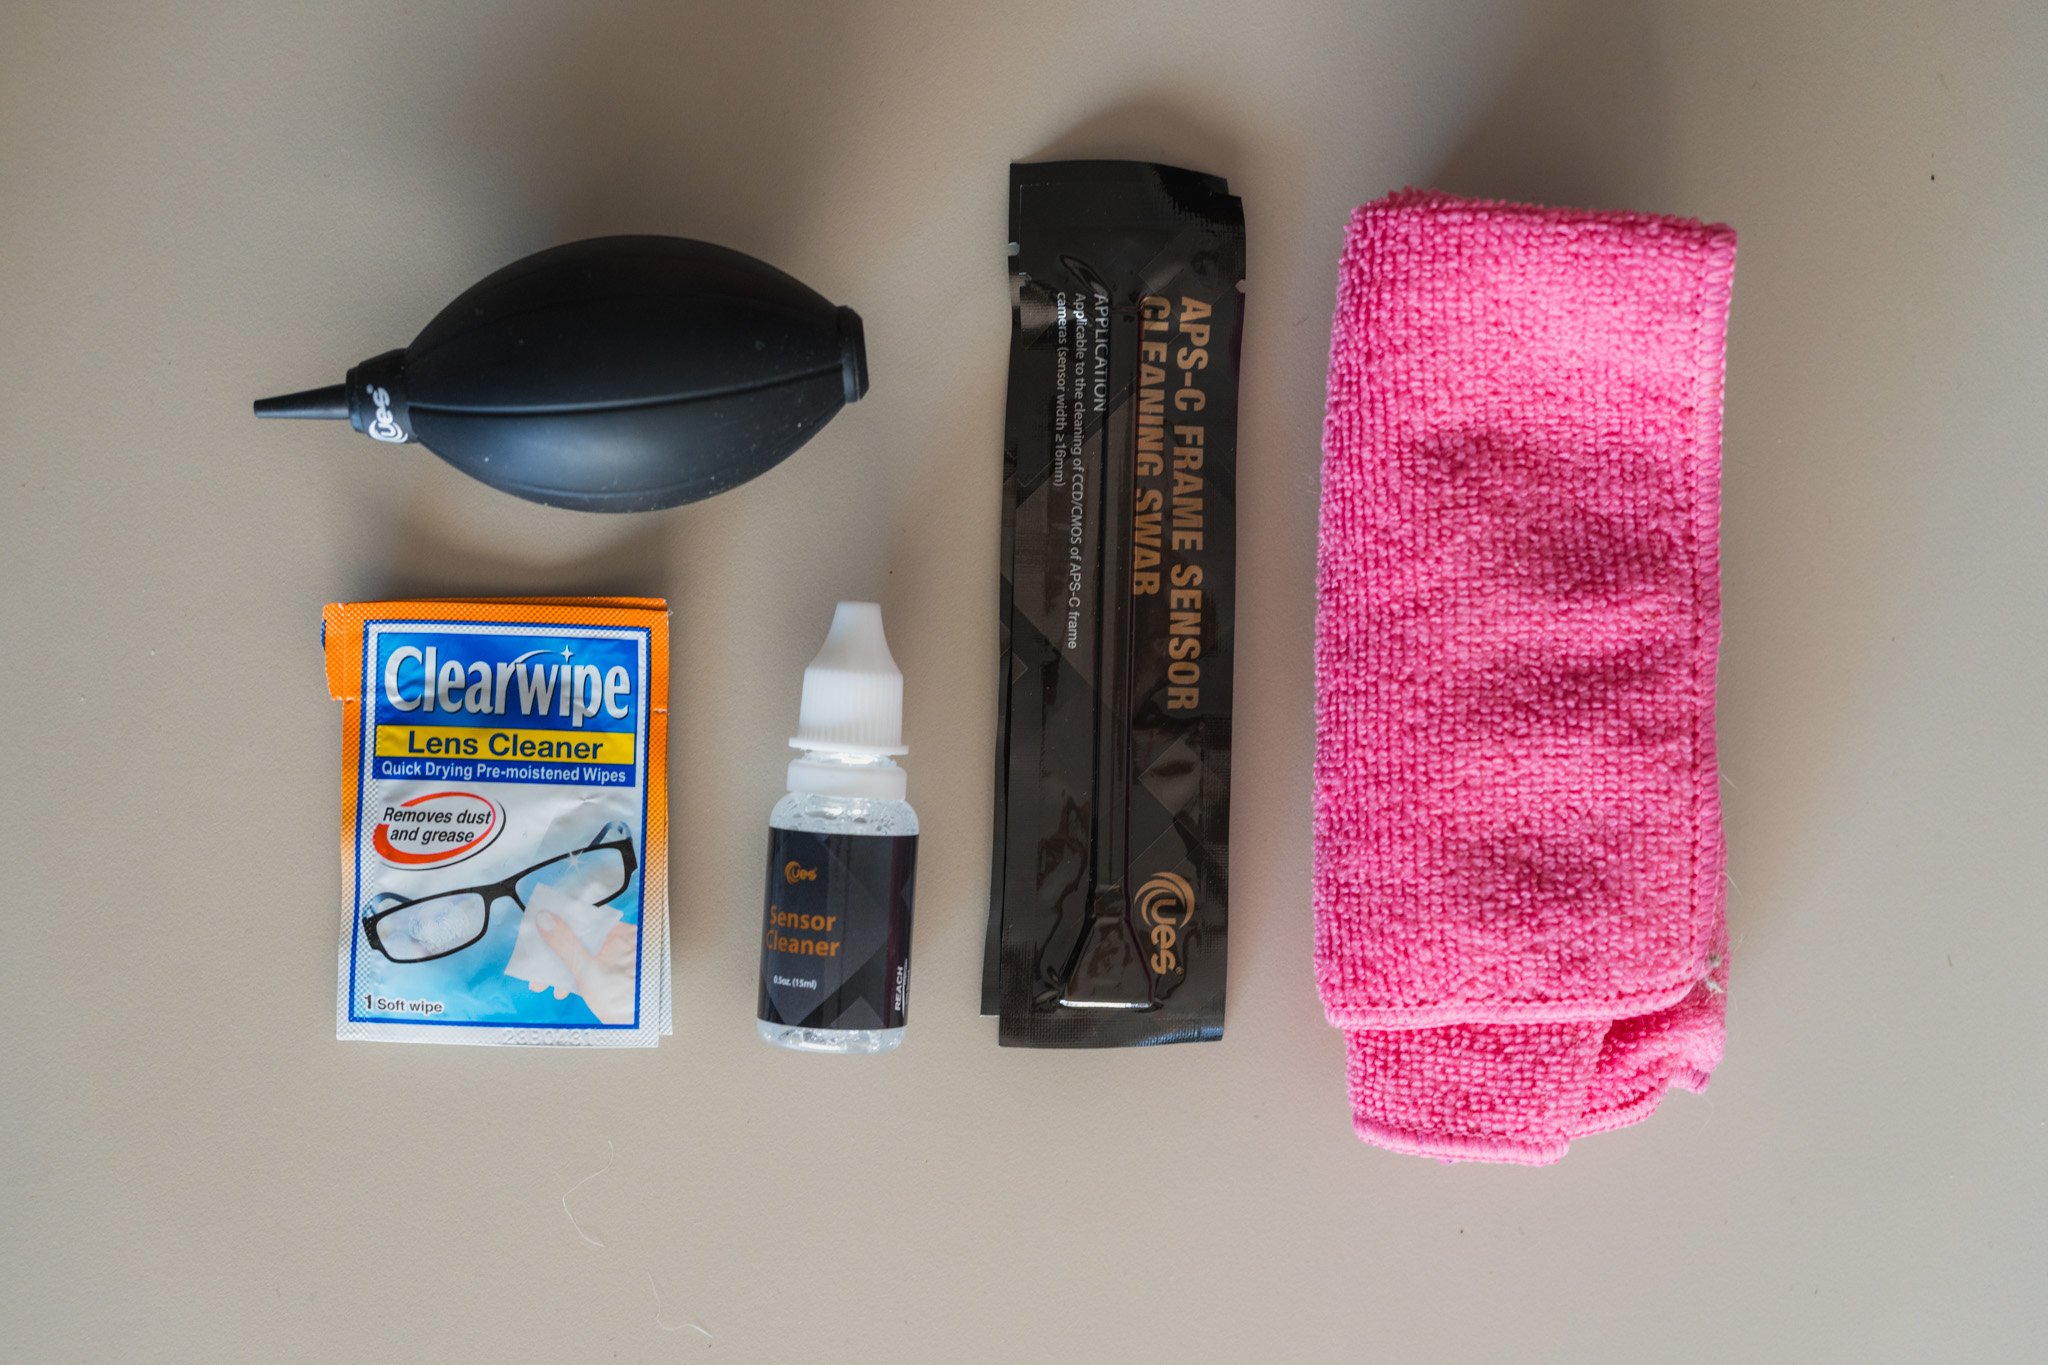
Cleaning: .Cleaning, having some wet wipes for glasses are perfect for on the go. Also a few dry wipes to help keep lenses clean. A small air blower is such a great tool that is worth packing to help dislodge larger debris from the sensor or both ends of your lenses. I also take two sensor cleaning sticks as sometimes life gets messy in the field.
The Bag
For five years, my go-to travel bag has been the Fjällräven 30L ULVÖ. It’s durable, waterproof, and has a simple, open design.
This bag was a purchase purely for me wanting a bag that has a big wide compartment so I can customise how I pack rather than getting sucked into packing for the bag. Some bags are over-designed and have pockets and compartments but I didn’t want any of that. It’s got everything I need, big open compartment, laptop compartment, a front section split from the main one that’s good for jackets or spare shoes and has a top compartment for quick access to little bits and bops. Side pockets for water bottles which can double as tripod or umbrella holders. It’s made of durable water proof material but still is very light. I’ve smashed this thing against a lot of adventures and it’s held up so I have no intention in looking at another bag.
The core reason I went for this style of bag is I wanted the ability to load all my clothes in the main compartment and then have a sling with all my camera gear packed up top. At the time I got this I was using a 6L Peak Design Sling but found it a bit to rigid and made the bag hard to close. Since moving to using the Bellroy sling I mentioned above. This works really well in this bag as a camera cube. I can comfortably pack it at the top of the bag and if there are any issues with carry on during a flight. I can simply pull the sling out and check the bag in.
Clothes
I stick to two Peak Design medium packing cubes. The trick? Quick-drying, odor-resistant fabrics:
Shirts: x4
Pants/shorts: x2
Underwear/Socks: x4 each
Extras: Lightweight trainers, a packable down jacket, and a rain jacket.
I’ll have some extra clothes on me on my travels which usually gets me easily a full week before I need to consider washing my clothes. For cold trips, I wear bulky items on the flight to save space.
A small toiletry bag forces me to only bring the stuff I need like, tooth brush, deodorant and various self care items, rather than luxuries I might use once or twice. Most general things like shampoo or soap, are left behind cause hotels will stock that stuff and if they don’t. Well most counties are going to have convenience stores and if Im going into nature then I’m happy to stink like the devil’s asshole for a few days.

One-Bag Mindset
My number one goal when traveling is fitting everything into one bag. Why? To avoid checking in luggage, plain and simple. It’s not just about the risk of losing bags (though that’s always a concern); it’s more about the freedom of having one less thing to worry about. I want to step off the plane, breeze through the airport, and get straight to exploring.
But the reality is, this comes with its challenges, especially when you’re traveling with tech and camera gear. Different airlines have different rules for carry-on luggage, particularly when it comes to weight. While most airlines have almost identical size limits for carry-ons, weight is where things can get tricky.
In my experience, a bag in the 30–40-liter range works perfectly for size limits on most airlines. Weight, however, is another story. Smaller bags naturally force you to make tougher decisions about what to bring, which often results in a lighter load, an added bonus.
Most airlines have carry-on weight limits between 7kg and 10kg. I generally aim for 7–8kg to stay within the safe zone. On full flights, airlines might weigh your bag, but if you’re carrying a small backpack that’s slightly over the limit, you’ll probably be fine. Worst case? You can quickly take out something like a lens or your laptop to adjust the weight.
From my experience, I’ve rarely had issues with a well-packed small bag, even if it’s a little over the weight limit. Airlines are more likely to target people with bulky rolling bags that look like they’re packed with 40 liters of solid lead. Stick with a compact setup, and you’ll save yourself a lot of stress.

Both of these travel kits proved their worth in Vietnam. The first build gave me versatility for a longer, mixed trip, while the second kept things lightweight and focused for urban exploration. The one-bag setup and carefully chosen gear makes traveling easy, efficient, and most importantly fun.
I’m not sure if I read this somewhere but when packing for a trip I use this saying to keep me in check:
Pack light, Explore more.
Here are a few links to more in-depth Blogs to some of the gear mentioned: